The Audio Plugins feature allows adding 3rd party audio plugins to inputs and outputs in vMix.
vMix supports all 64-bit VST3 audio plugins. VST3 is a popular audio plugin standard by Steinberg commonly used by DAW (Digital Audio Workstation) software.
To install an audio plugin, simply install it to the computer using the provided installer from the plugin vendor.
Once installed, it will appear automatically in vMix without any additional configuration required.
1. Open the Audio Mixer in vMix by clicking the Audio Mixer tab in the middle right of vMix.
2. For Inputs: Locate the mixer for the audio input and click the cog icon to open up Audio Settings.
For Audio Buses: Locate the audio bus such as Master and click the cog icon to open up Audio Settings.
3. Click the Plugins tab as shown below:
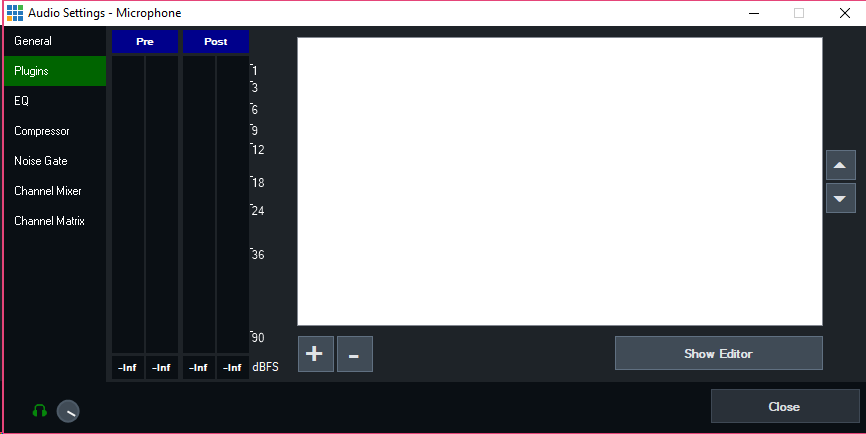
4. Click the + button to add a new plugin.
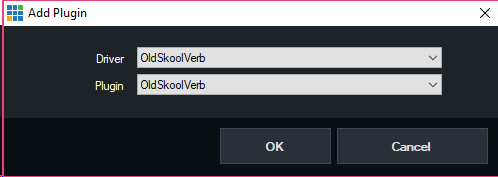
Select the plugin to add from the Driver and Plugin dropdown boxes and click OK.
There are two boxes because some plugins may have multiple variations available within a single plugin set.
In the above example the free "OldSkoolVerb" plugin has been selected, which is an audio reverb plugin.
5. Once added, the plugin will appear in the list. To configure the plugin's settings click Show Editor.
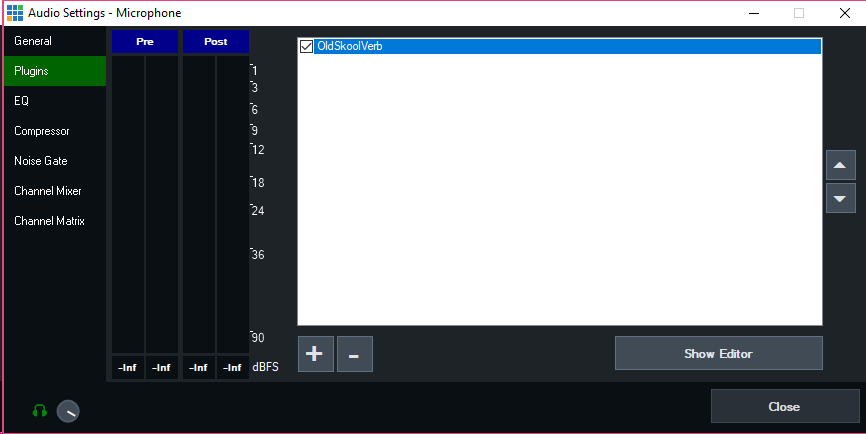
A checkbox next to each plugin in the list can be used to turn on or off that plugin.
Plugins are applied to the audio in the order they appear in the list starting from top to bottom.
The two arrow buttons at the right side of the list can be used to change the order.