How to add a Shortcut
From the vMix Settings window click the Shortcuts tab and then click Add
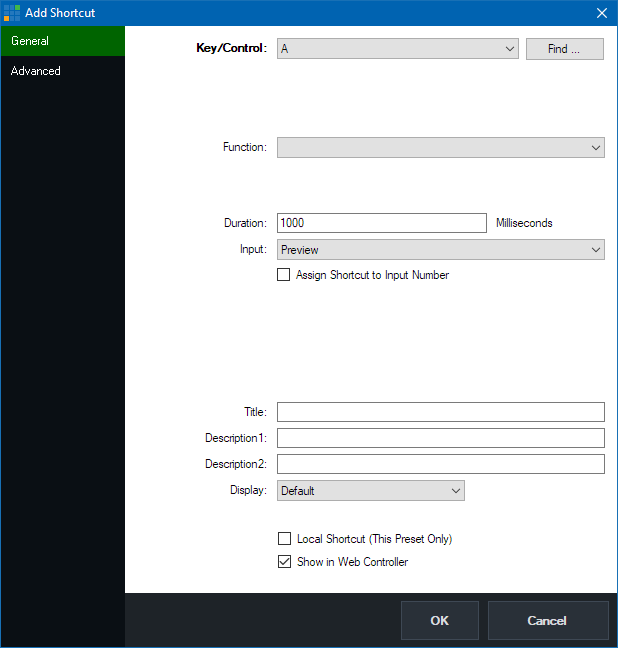
To quickly select the Key or Control you wish to assign this shortcut to, click the Find ... button
and then press or move the control you wish to use.
MIDI Note: If using a MIDI controller, make sure it has been plugged in and turned on before starting vMix.
Then from the Shortcuts tab in Settings click the MIDI Settings button to enable the device.
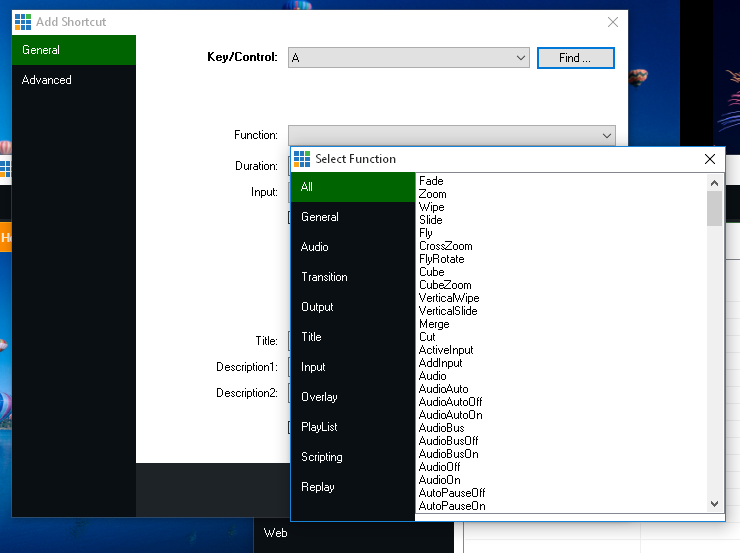
Function
Click the arrow next to the Function dropdown box and the Select Function window appear with a number
of commands or macros to choose from, organised by category.
Duration
If the function selected is a transition, configure the duration here in Milliseconds
Input
If the function controls a particular Input, select it here.
You can also tick Assign Shortcut to Input Number so this shortcut will always
control any input assigned to a particular Number, otherwise the shortcut will
control the same input even if it has been moved.
Title, Description1, Description2
Assign some optional text to uniquely identify your shortcut when it is displayed in the Web Controller
Display
Configure the display options when showing this shortcut in the Web Controller.
Default: The standard button with text.
Colour: Customise the background colour of the standard button with text.
Image: Select a custom image file to display in place of the button. The image will be stretched to fit the button dimensions.
Thumbnail: Display a thumbnail preview of the Input's contents at the time when the Web Controller page was last refreshed.
(Note: This is not a live thumbnail preview, but the latest image can be downloaded by refreshing the page in the web browser).
Local Shortcut (This Preset Only)
Assigns the shortcut to the currently open Preset, otherwise the shortcut will be available
to use with any preset.
See Local and Global Shortcuts for more information.
Show in Web Controller
Untick this box to hide this shortcut from the vMix Web Controller interface.